.webp)
How to: The Ultimate Amazon Brand Store Guide
The Brand Store is like having your own Website, but on Amazon. Learn how to build your successful Brand Store on Amazon in just a few steps! In this Guide we will help you and show you each step.
Introduction: What is an Amazon Brand Store?
As the world’s leading e-commerce giant with a massive customer base, Amazon is indeed the best place to showcase your product range and unique value proposition as a brand in the digital world. Apart from Amazon A+ Content (also known as “Enhanced Brand Content” or EBC), which provides a way to highlight and showcase your products and brand values, you can further introduce and establish your company on Amazon with an additional Amazon Brand Store.
A Brand Store acts as a “digital storefront” and is an excellent tool for increasing your visibility and boosting your sales. Through an Amazon brand shop, customers can explore and get to know the quality of your brand and your entire product range. It allows you to enhance the engagement between potential customers and your brand by creating a rich and unique shopping experience.
Metrics such as internal and external traffic or revenue tend to improve with the presence of a brand store. Over time, the improvement of these factors also contributes to higher ranking positions on Amazon itself and on Google
search result pages.
What requirements do you need to fulfill?
Before you learn step by step how to create your own Amazon Brand Store, you must fulfill an important requirement in order to follow our guide. The prerequisite is: Registering your brand with Amazon.
Only through brand registration with Amazon, tools like Amazon Brand Stores or A+ Content will be unlocked for you. Therefore, make sure to register your brand with the Amazon Brand Registry beforehand. Once you’ve completed the brand registration, you can easily create an Amazon Brand Store in Vendor or Seller Central. Already done? Great! Let’s begin!
How to create a Brand Store on Amazon?
1. Login to Vendor or Seller Central: Open your Amazon seller account at https://sellercentral.amazon.com/
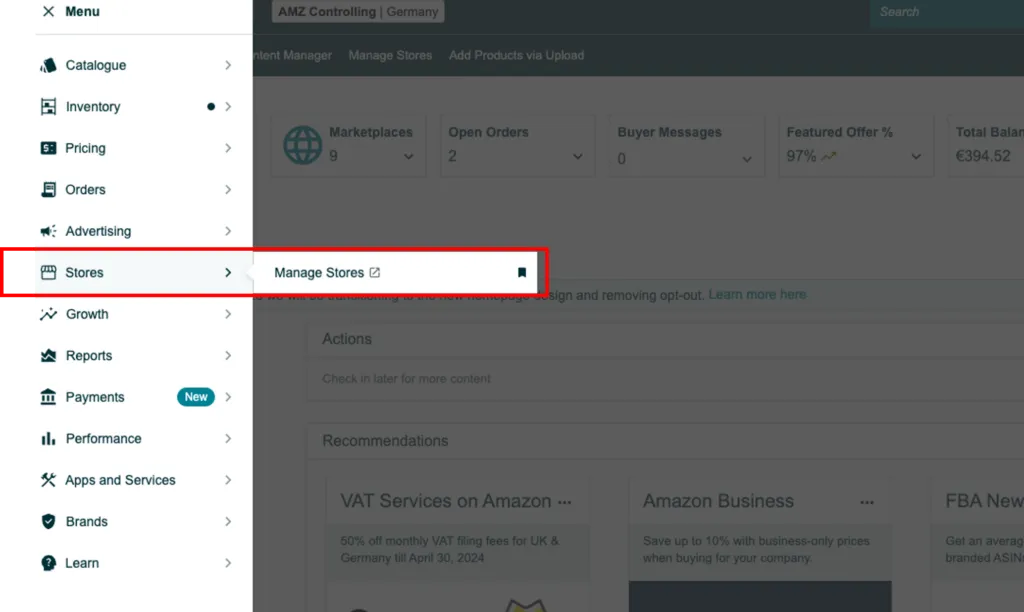
2. Click on the “Stores” tab in the navigation menu, then select “Manage
Stores”. This will automatically take you to the Amazon Advertising
Console, where you will find a list of your registered brands. Choose a brand
and then click on “Create Store”.
3. Open the “Store Builder” available in the Amazon Advertising Console,
to begin building your shop.
4. Start designing and building your brand store: The layout of the landing
page(s) follows a simple “drag & drop” principle using a straightforward
building block system.
GOOD TO KNOW:
All design elements and main components are fully customizable and can be arranged according to your preferences (header, navigation bar, product grid, deal widgets, etc.).
The “Store Layout” can be adapted by rearranging the available tiles and templates, allowing it to vary from shop to shop. Amazon provides you with significant creative freedom, allowing you to choose a selection of products and multimedia options to showcase everything your brand has to offer in the best possible way.
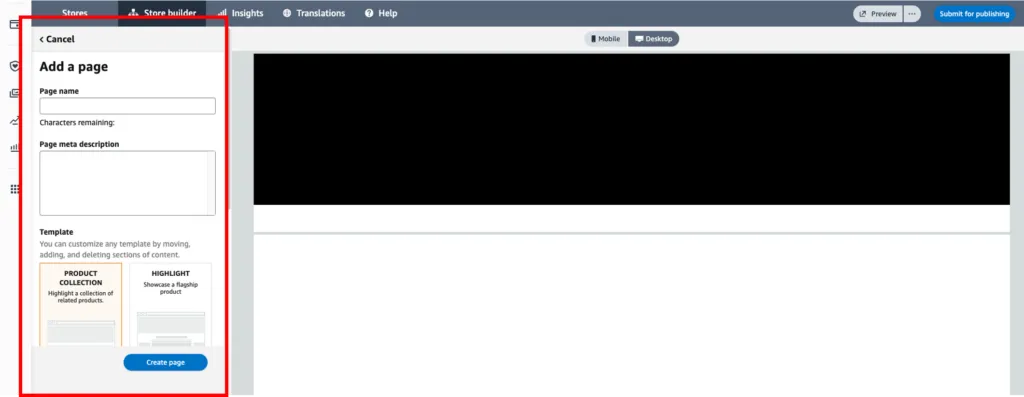
5. Select Homepage Layout: Choose a template that best suits your shop (e.g., a simple product grid for a clear display of your assortment). You also have the options: “Marquee” (tell brand story), “Highlight” (showcase product highlights, bestsellers), and “Blank” (build the page from scratch, no code).
6. Building subpages: Once you have selected your Homepage Layout, you can start constructing the layers of your shop. These layers are pages within pages (categories, subcategories, or product pages) that visitors will explore when browsing through your store. To build the subpages, you have various templates and elements available on the right side of the Store Builder. You can choose and insert a suitable element by clicking on the “Add New Section” button.
Tipps for Building the Brand Store
- Plan ahead and determine the different levels and subcategories you need or want to use.
- Guide your customers through a clear Brand Store with internal links and landing pages, along with a straightforward, logically structured, and user-friendly navigation. Each Amazon Store can have up to 3 levels with various pages on each level. Keep things simple!
- Build categories and navigation menus similar to your online shop. This way, you can create a cohesive brand presence and foster recognition.
- We also recommend reading and adhering to Amazon’s guidelines for stores.
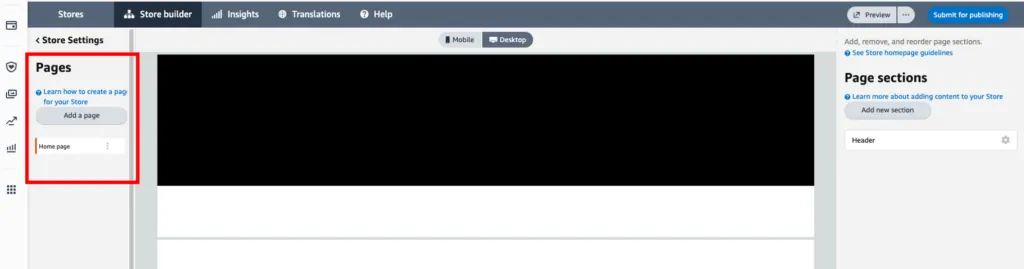
7. Add subpages: Go to the Page Manager on the left and then tap on “Add Page” to create subpages/categories for your shop. On the subpages, you can, for example, compare different product types or showcase the entire range of a product category,
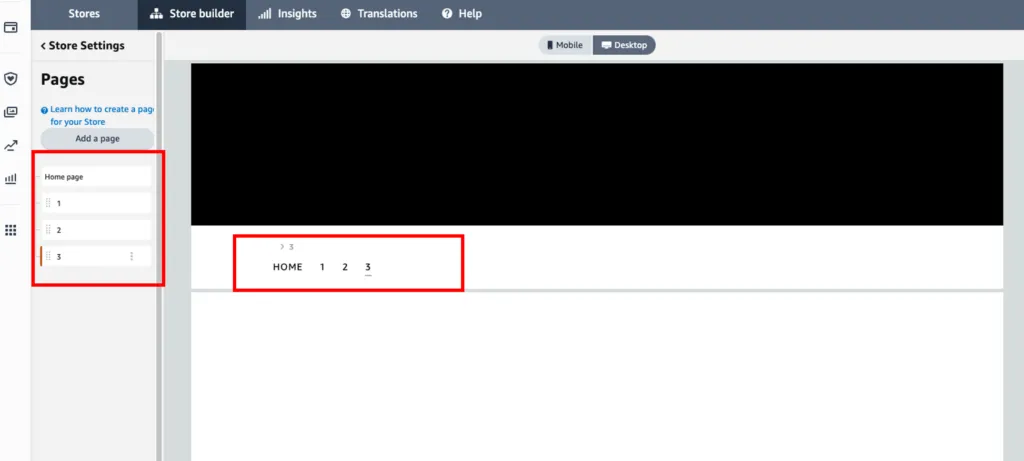
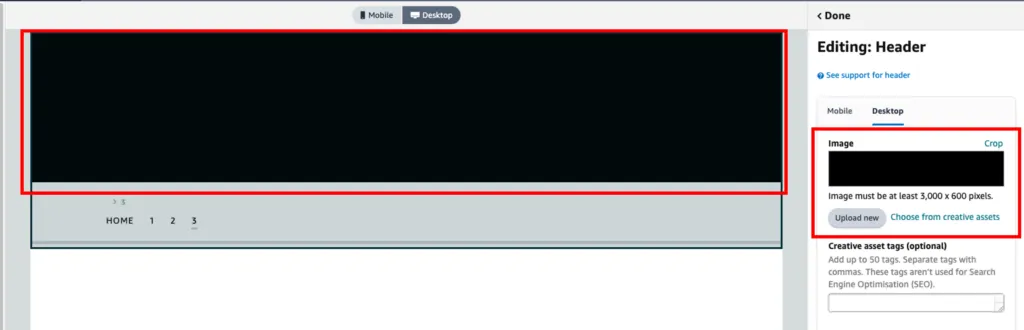
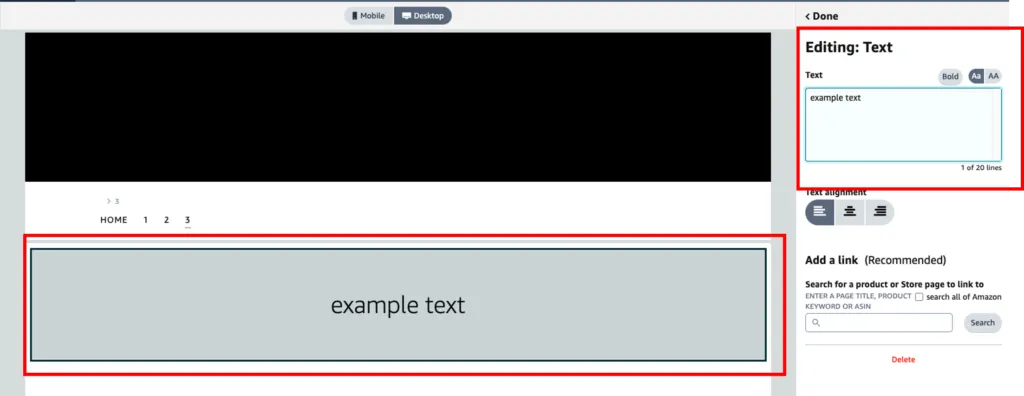
8. Adding Content: Once you have set up your levels, you can add various content to each page on the right side. To do this, you will use content tiles. The types of tiles available include, for example: Header, Text, Image, Image with Text, Video, Image Gallery, Recommended Products, Bestselling Products, Product Grid, etc.
GOOD TO KNOW:
The right side of the Store Builder is your “Tile Manager.” Here, you can add or rearrange text, photos, and videos on your pages. Simply click the “Add New Section” button to add new tiles/elements. You can easily move added tiles anytime using drag and drop to change the order of elements.
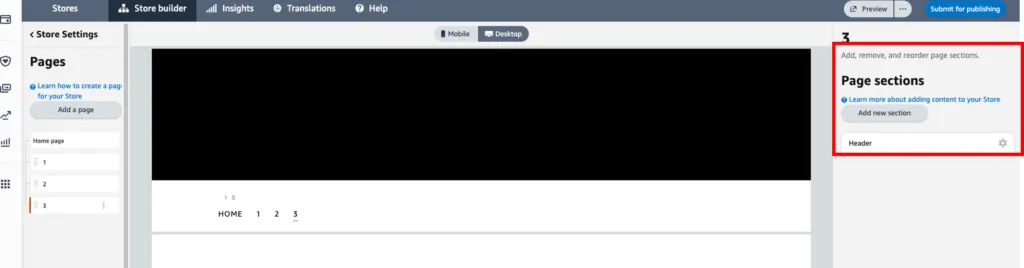
9. Click on “Add New Section” and select the desired tile type. When designing the layout of the pages, keep it organized and avoid using too many elements on one page.
GOOD TO KNOW:
Primarily use the “Product Grid” element. This way, you can add all products of the corresponding category via ASIN. Your customers can see complete product lines or ranges at a glance and can instantly add products to their shopping cart using a button.
The key principle here is: “The fewer clicks to the shopping cart, the better!” Otherwise, there’s a risk that customers may bounce off early and leave your store.
10. Next, fill in the tiles or sections with all the necessary information (image, text, product ASINs/links, videos, etc.).
Tips for designing the Brand Store
You can create very attractive and diverse pages in your shop. We recommend creating a plan and preparing the necessary content (text, images, videos, etc.) for your Brand Store before starting the design.
This way, you can showcase your corporate design and products through custom widgets, compelling images, videos, and texts. Additionally, consider highlighting bestsellers or new items in the top section of pages.
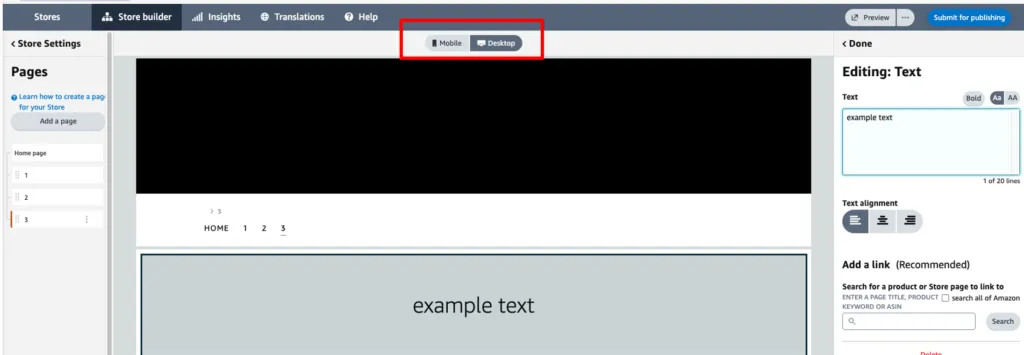
11. Once you have filled in the essential elements and selected all the products to be highlighted in the shop, you can click on “Preview” to see how your shop will appear on popular desktop and mobile browsers. You can choose between „mobile“ and „Desktop“.
GOOD TO KNOW:
During the editing process in the Store Builder window, you can also switch between “Mobile” and “Desktop” view to get an impression of how your page will look.
Make sure to optimize the mobile view as well, as most sales on Amazon are generated through the app on mobile devices.
12. Submit thecompleted store for review: Once you have finished designing your shop, click on the “Submit for publishing“ button. The approval process will now be initiated.
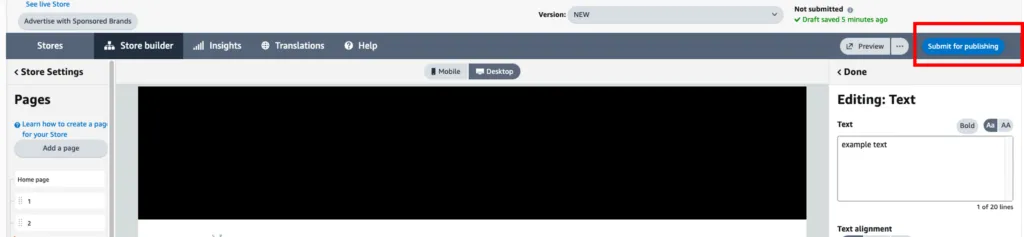
13. It may take up to three days for your Brand Store to be approved. Amazon reviews your content before publication to ensure compliance with all guidelines (grammar and spelling errors, incorrect images or videos, inconsistencies in branding, as well as incorrect ASIN links and pages). Until the store is approved, it will not be visible to your customers on Amazon. However, in most cases, stores are approved and go live within 24 hours.
14. Any necessarychangesmust be made by yourself in case of rejections or denials by Amazon before your Brand Shop can be published online. Only after the approval process is completed, the Brand Store will be published.
Congratulations, your Brand Store is now live! What’s next?
Develop effective marketing strategies to increase the visibility of your Brand Store. How to do it best?
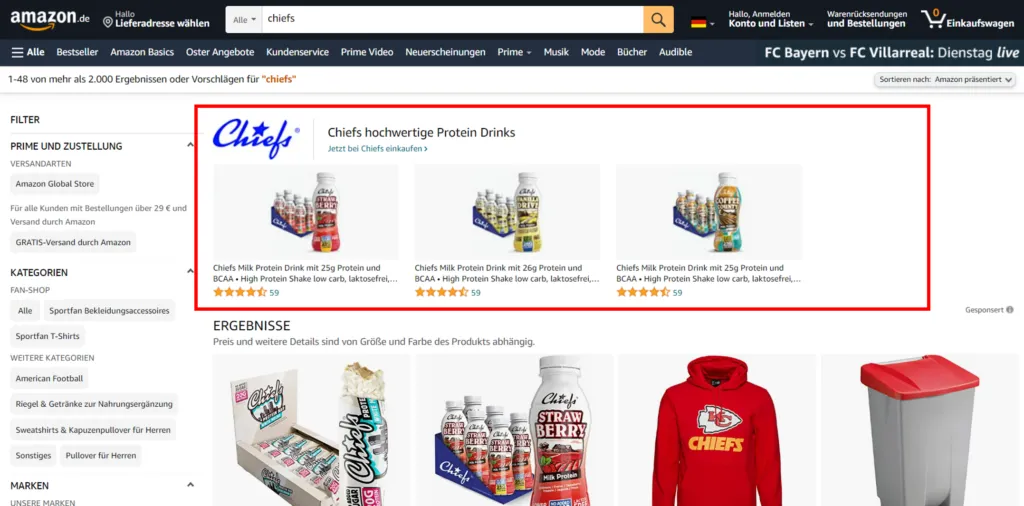
We have some tips for you: Utilize Amazon PPC or Sponsored Brand campaigns to promote your store products to your target audience. These are eye-catching ads
DID YOU KNOW?
Once your Brand Store is live, you can click on “Store Builder” and then on “Insights” in the navigation bar on the right to view the overall performance of your shop, including metrics such as page views, visitors, and sales.
You can effectively use this reporting tool to optimize your advertising campaigns!
- Utilize Amazon PPC or Sponsored Brand campaigns to promote your store products to your target audience. These are eye-catching ads with prime placements that appear at the top of search result pages.
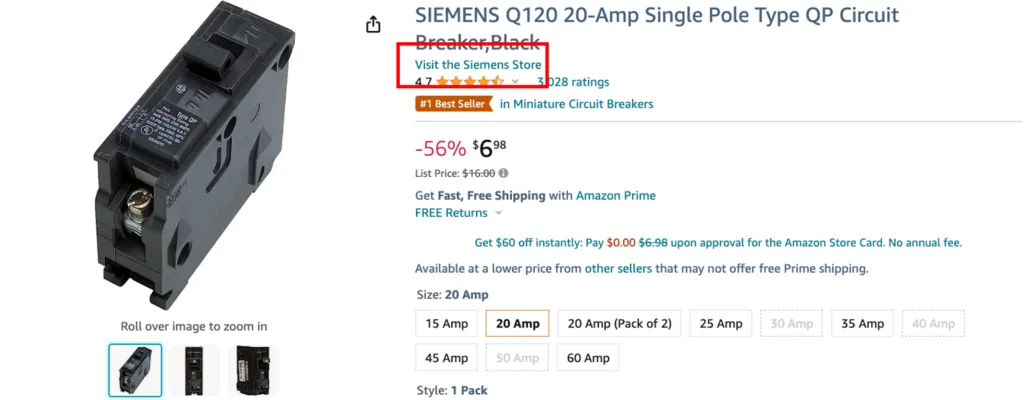
- Link your Brand Store to the product detail pages of the shop products (Store Byline).
- Add a clearly visible shop link to all your marketing activities – both on and off Amazon (e.g., newsletters, email campaigns, etc.).
- Share the link to your Brand Store on all your social media channels (e.g., Facebook, Instagram, YouTube, etc.).
Examples of well-structured Brand Stores:
FAQs for Amazon Brand Stores
Who can create/use Brand Stores?
Amazon Brand Stores are available to both Sellers and Vendors (Merchants) on Amazon who have registered their brand in the Amazon Brand Registry.
On which marketplace can I create a Brand Store?
Brand Stores are available on all major marketplaces (DE, ES, FR, IT, NL, PL, SE, TR, UK, CA, MX, US, AU, IN, JP, SG). So, when you expand, you can also create and showcase your product range on international marketplaces.
How much does a Brand Store on Amazon cost?
Once you have registered your brand with Amazon, the Store Builder is available to you at no additional cost. So, there are no extra charges for creating a Brand Store.
How can potential customers and buyers find my Amazon Store?
On Amazon, Brand Stores can be accessed through the Store-Byline, which is a branded link displayed either below or above the title on the respective product detail page. Utilize external traffic to drive potential buyers to your Amazon shop from outside sources. For instance, you can link your store in newsletters or on your social media channels.
Conclusion
As you may have already noticed, creating a Brand Store is fortunately not a very difficult process. In fact, one could even say it’s a highly creative activity that can be enjoyable. However, if you’ve just started selling your products on Amazon or if you need assistance in expanding your offerings through a Brand Store, we, as a Full-Service Amazon agency, are here to help.
Thanks to our extensive experience with Amazon, we have already assisted many clients in successfully expanding their offerings through a Brand Store and increasing brand visibility.
In any case, we wish you lots of fun creating your Amazon Brand Store, and we hope our guide has been helpful to you!
Best regards,
Your ama-X Team

Global expansion on Amazon with AMA-X
.webp)
64% (7-digit) growth per year
600+ SKUs
Expands into 6 target markets

Brand development with AMA-X Foundation & Growth
102.6% revenue growth & 134.2% profit growth
TaCoS 4.26% (share of advertising costs)
17.77% conversion rate

case studies


Had enough of the Amazon jungle? We'll clear the path for you!
Contact us without obligation!

Viktualienmarkt 8
80331 Munich
Germany